My coffee workflow
by Clement Delafargue on April 1, 2025
It is my first April cools’ and I guess I could start by talking about coffee. If you’ve seen me in person, it won’t be a surprise, I guess.
This post is dedicated to Brendan’s memory, he loved good tea, and good coffee. He’s the one who talked me into getting my aeropress, with which everything started.
After some time getting by with a hario slim, an aeropress and a chemex, I settled on a ceramic v60 for pour-over and a flair 58 for espresso.
Before reading all this, don’t forget that even though I’ll talk about brewing methods and tools and setup, the most important part of this is coffee (duh). Even without brewing it at home, there is tons to learn about it, and if you find a good specialty coffee shop, you’re in for a treat. Discovering natural and anaerobic processed coffee was an incredible experience. Coffee doesn’t have to be this burnt, bitter drink. When processed, roasted, and prepared correctly it’s a fun and challenging experience.
Pourover with V60
I start by putting the v60 brewer on top of the kettle and turning it on. These days, I set the temperature around 96C, because I tend to use light-roasted coffeee, YMMV. Putting the brewer on top of the kettle allows it to preheat without having to waste any water.
While the water gets to temperature, I weigh either 12g or 15g of coffee, sprinkle them with water and grind them on a medium-fine setting (the grinder I have is great but does not have a fixed reference frame so actual numbers don’t matter). I adjust the grind size based on the brew time, actual numbers depend on the coffee preparation method (coarser for washed coffees than for anaerobic ones, usually) and on the roasting date (I need to go finer as the coffee loses its CO2)
Once the coffee is ground and the water is hot (or at least the brewer), I put a paper filter in the brewer and rinse it. I throw the water away and then put the coffee in it, and dig a small well with a chopstick.
Then it’s 60g of water in for a 30 second bloom, then 2/3 of the water (120g for 12g of coffee, 160g for 15g of coffee), a gentle stir, then I wait for 1’10”, and I put in the rest of the water (180g for 12g, 240g for 15g), stir gently and wait for the water to go through. I target a 2’30” brew time and keep track of the grind size for the next time.
A gooseneck kettle is handy to gently pour water in concentric circles, while being careful to not pour water directly on the filter.
The V60 is my favourite method for single-cup pour-over, as I have been able to compare it with other preparation methods (aeropress, kalita, chemex) and found it to provide the sharpest results. Other methods with longer infusion times tend to dampen out flavors a bit.
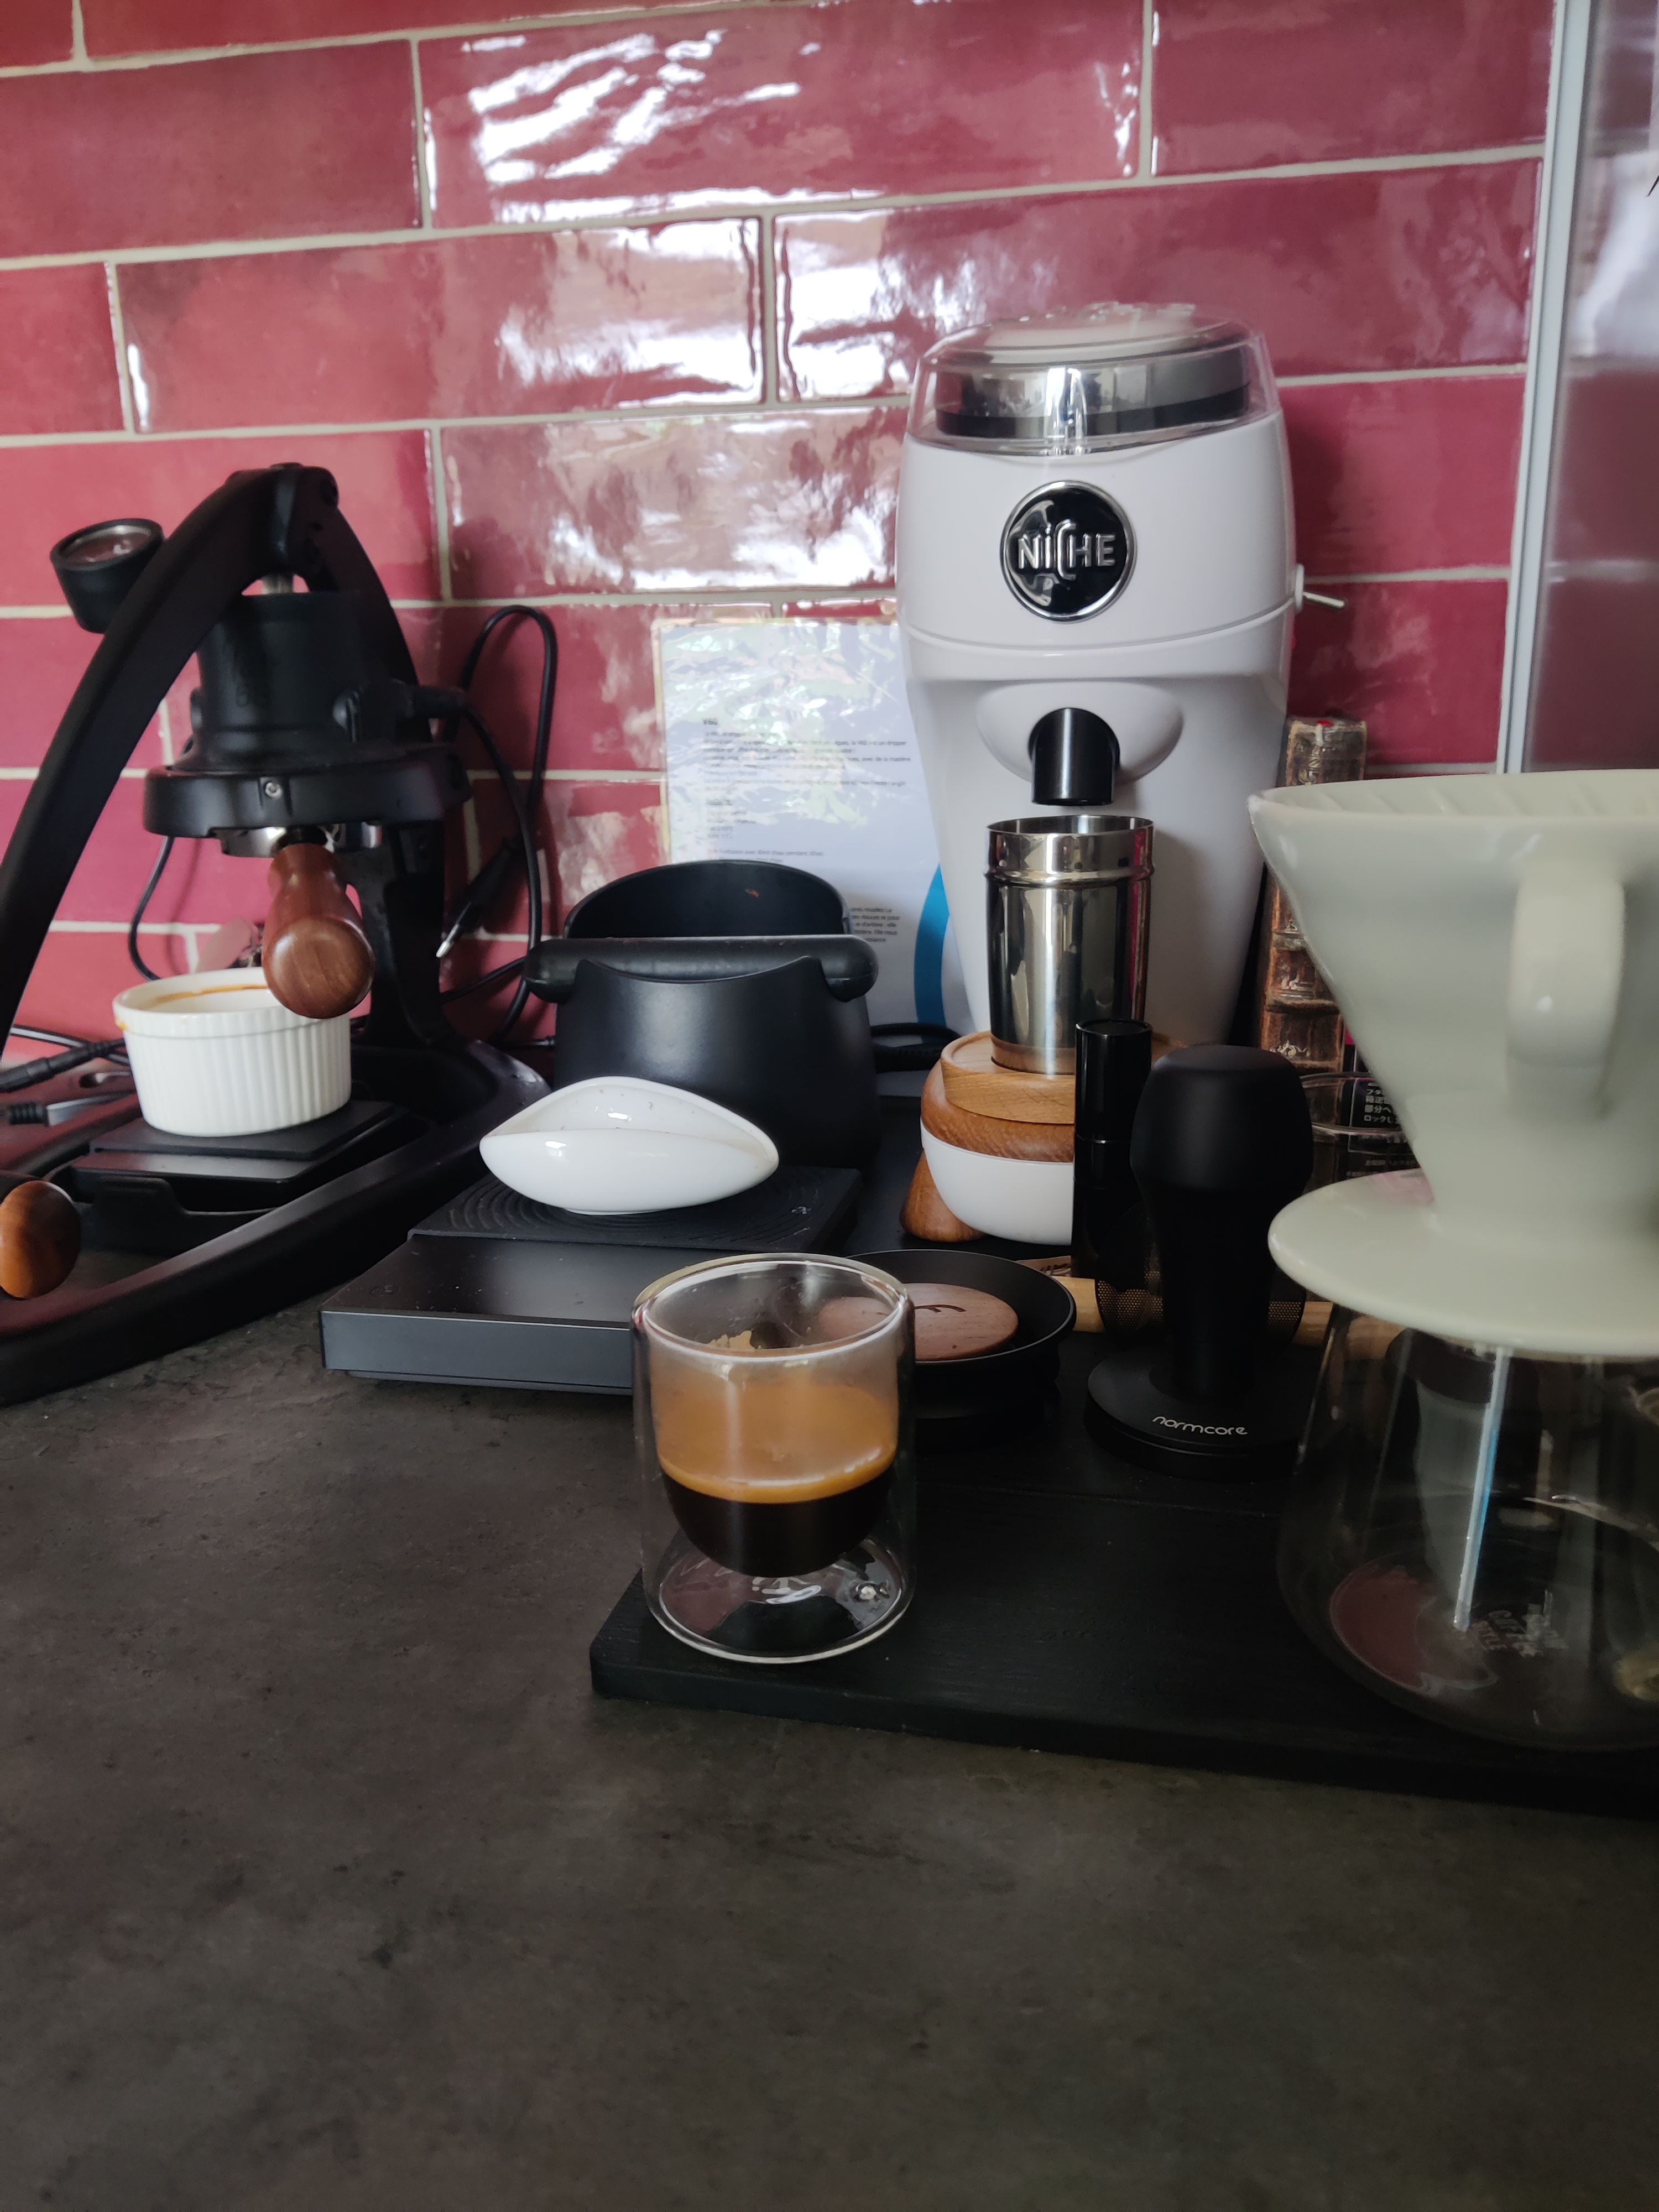
Espresso with flair58
After getting a good grinder, I started home espresso with a flair 58+. It’s a manual espresso machine, but it still uses a regular portafilter.
Same as for the V60, proper pre-heating is important to get good results. So I start by putting the kettle on, with the portafilter on top (it sits a bit awkwarldy, but it works). At the same time I turn on the flair58’s electric pre-heater. Since I mostly use light-roasted coffee, I set the kettle around 96C and the pre-heater on the highest setting.
While everything gets up to temperature, I weigh 18g of coffee, sprinkle it with water and grind the beans (I haven’t tried other machines, but I’ve read that the flair 58 requires a slightly finer grind than other machines).
Once the portafilter is hot enough, I wipe it with a clean cloth to remove water from the kettle, and start puck prep: first I break clumps with a WDT tool, then a couple spins with a distributor (not really needed, but it helps make things a bit less messy), and then tamp it down. Finally I place the puck screen on top of the puck. A few strokes of brush to remove ground coffee from the portafilter edge and I set the portafilter on the machine. Then I adjust the small mirror to view the bottom of the portafilter.
Once all that is done, both water and machine should be hot enough. I turn the scale on and put the espresso glass on the scale (the scale detects the glass, tares itself automatically and waits for the first drops of coffee to start the timer).
Then in pour water in the brew chamber, lift the lever to make the water go under the piston, and pull down to reach 3bars. At this point, the resistance on the lever give me a first indication of wether the grind size was ok. It should take a few seconds for the water to saturate the puck and the first drops to fall. 10 seconds after the first drop falls (and the scale timer starts), I ramp up to 9bar, until the scale reads 20g and then ramp down to 6bar. When the scale reads 34g I lift the lever up, in order to get a final yield of 36g (there is a bit of lag, allowing ~2g to go out while I stop pushing and start lifting). At this point the scale stops, giving me the final time between the first and last drop. This time gives me a good indication of whether the grind size was ok.
At this point, if I’m still in the process of finding the right size, I write down the grinder setting and the yield time before forgetting it.
I then unplug the heater, remove the espresso glass and replace it with a small container, remove the shot mirror to avoid projections, push the lever down again to draw the rest of the water, remove the portafilter, give a gentle knock on the tamping mat to remove the puck screen, and then knock the puck off in my knock box. I rinse and wipe the portafilter right away, rinse the puck screen and stow it in the tamping mat, and clean the WDT tool, the portafilter funnel, the distributor and the tamper. This lets me have a clean counter right away, and gives time to the espresso to cool down a bit.
Then it’s time to taste the espresso. If I’m still in the process of dialing in, I write down tasting notes.
All that sounds a bit involved but it only takes about a minute and parallelizes rather well. And of course the results are incredible. This also helps me limit my daily consumption of coffee to two cups, so one can argue it’s good for my health.
When I am not at home
The drawback of all this is that I no longer enjoy drinking coffee when I’m not at home or in a good coffee shop.
So when I’m away from home for a few days and have some spare space in my luggage, I take a scale, a hand grinder and my aeropress. This gives me good results, especially with the prismo cap. It allows me to have results comparable to the inverted aeropress method, but it’s way simpler and less risky.
I have also purchased a clever dripper for my parents, which allows me to use regular melitta filters and a regular, non-gooseneck, non-temperature-controlled kettle. I just need to bring my scale and my grinder.
I’m mostly settled for on-the-go filter/pour-over, so I have started experimenting on travel espresso with a Flair Go. It’s definitely rough around the edges and I feel I have to re-learn everything, but I was able to pull a couple decent shots with it. It’s a hassle compared to the flair 58, but it is incredibly compact.
Don’t panic, start with good coffee and a good grinder
This can feel overwhelming (and expensive), but I got there after a few years.
You could start by finding a good coffee shop and taste pour-overs there, to see if you like it. Good pour-over has really little in common with regular filter coffee. If you’re in Nantes, I can’t recommend Cime Café enough.
If you like that, you can start with a good pour-over-capable manual grinder (espresso-capable grinders, manual or electric are more expensive). Combined with an aeropress, a clever dripper or a plastic V60, you can have great results quickly. No need for an expensive temperature-controlled kettle, with lightly-roasted coffee, taking water fresh off the boil works great. With the V60, you still need to be able to pour water precisely, so a gooseneck pourer will come in handy (or a gooseneck kettle, but that’s more expensive). Another good buy is a coffee scale. You can definitely use a regular scale, but coffee scales make things way easier (kitchen scales usually shut-off automatically when you’re waiting between pours, especially with the chemex).
Finally, just try things out and start simple. Coffee ASMR influencers might make you think that you need a $3000 grinder, a $200 scale, a $5000 machine, dozens of gadgets and a 36-step routine, but it’s actually quite simple to drink delicious coffee at home. Just buy good, freshly roasted coffee and grind it properly. Start from there, try to be consistent (that’s where the scale helps), take notes and experiment. If you have the opportunity, try various methods with the same coffee at a coffee shop, or with friends. You’ll get a feel of what each method brings. Tasting the same coffee brewed with a V60 and a 9barista (thanks Romeu!) is what got me into espresso. Similarly, I tried the same coffee brewed with a Chemex, an Aeropress, a V60 and a Kalita wave dripper in a tasting session, and I found that I had a strong preference for the V60.
To sum up, start with good coffee, then a good grinder, and then have fun with various methods, or just find one that suits you.